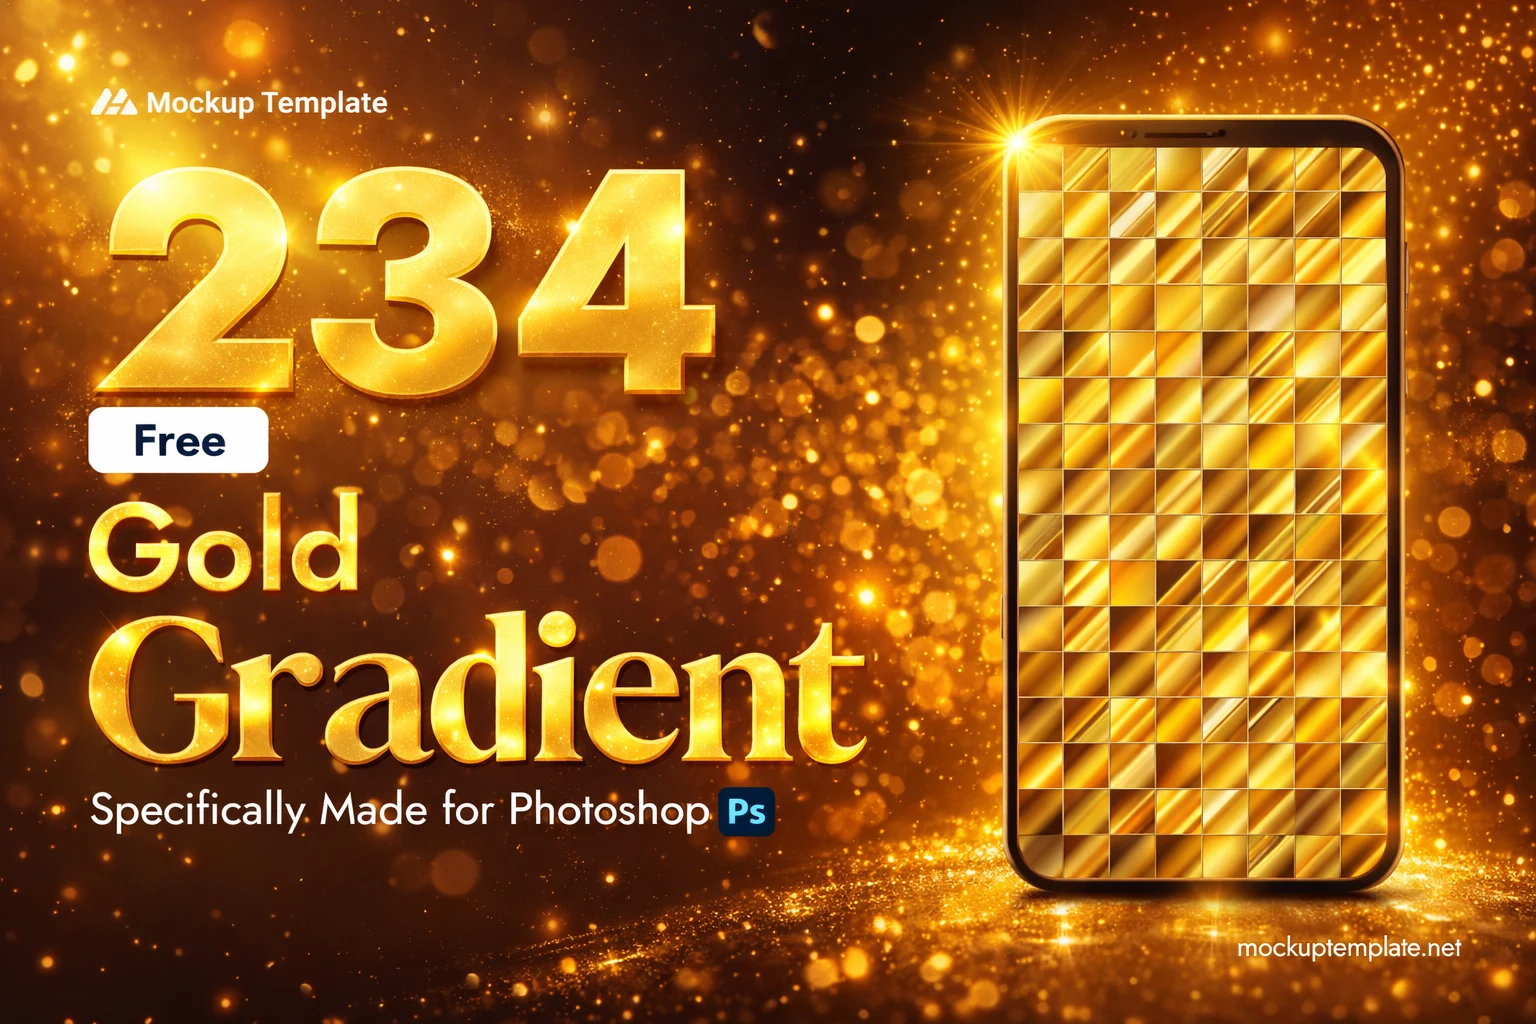
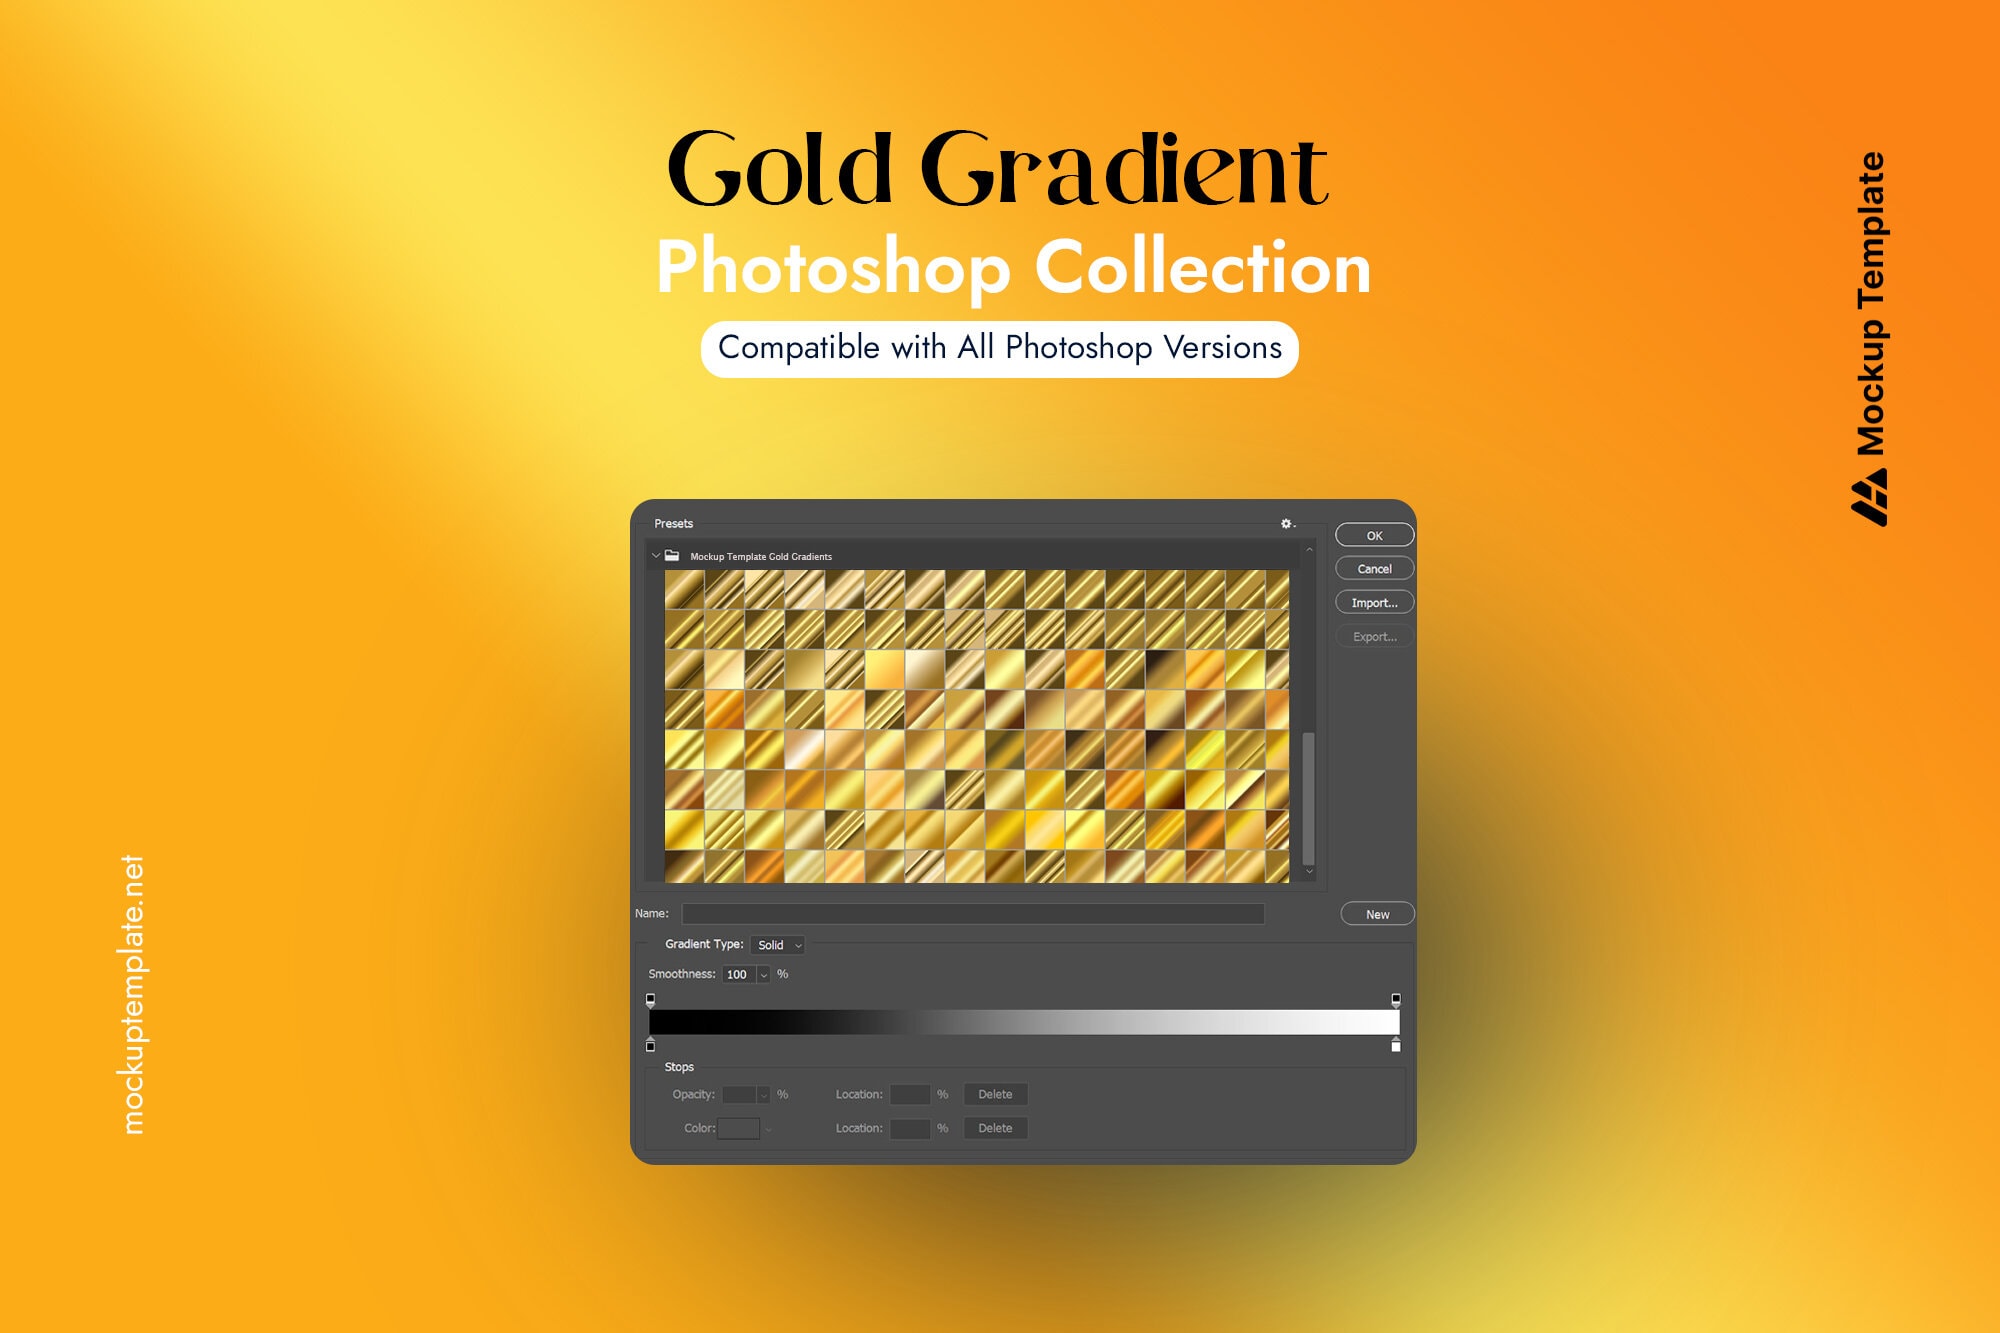
This free gold gradient Photoshop pack includes 234 individual presets in .GRD format, covering every shade from pale champagne gold and antique burnished gold to deep metallic and rose gold. All presets are ready to import directly into Photoshop CS6, CC, and 2025 — no account needed, no watermarks, free for personal and commercial use.
What’s Included in This Free Gold Gradient Photoshop Pack
- Light Gold & Champagne (soft, elegant tones)
- Antique Gold (warm, muted, aged look)
- Deep / Dark Gold (rich, dramatic)
- Rose Gold (warm pink-gold blend)
- Metallic Shimmer (high-contrast sheen)
- Burnished Gold (textured, luxury feel)
- White Gold & Platinum (cool-toned variants)
- Multi-stop Complex Golds (3+ colour transitions)
How to Install Gold Gradient Presets in Photoshop
For Photoshop CC 2020 and newer:
Step 1 — Download the .GRD file and unzip the folder.
Step 2 — Open Photoshop. Go to Window → Gradients.
Step 3 — Click the menu icon (top-right of the Gradients panel).
Step 4 — Select “Import Gradients…” and locate your .GRD file.
Step 5 — Click Open. Your gold gradients appear instantly in the panel.For Photoshop CS6 / CC 2019 and older:
Step 1 — Go to Edit → Presets → Preset Manager.
Step 2 — Set Preset Type to “Gradients”.
Step 3 — Click Load, select your .GRD file, click Open.
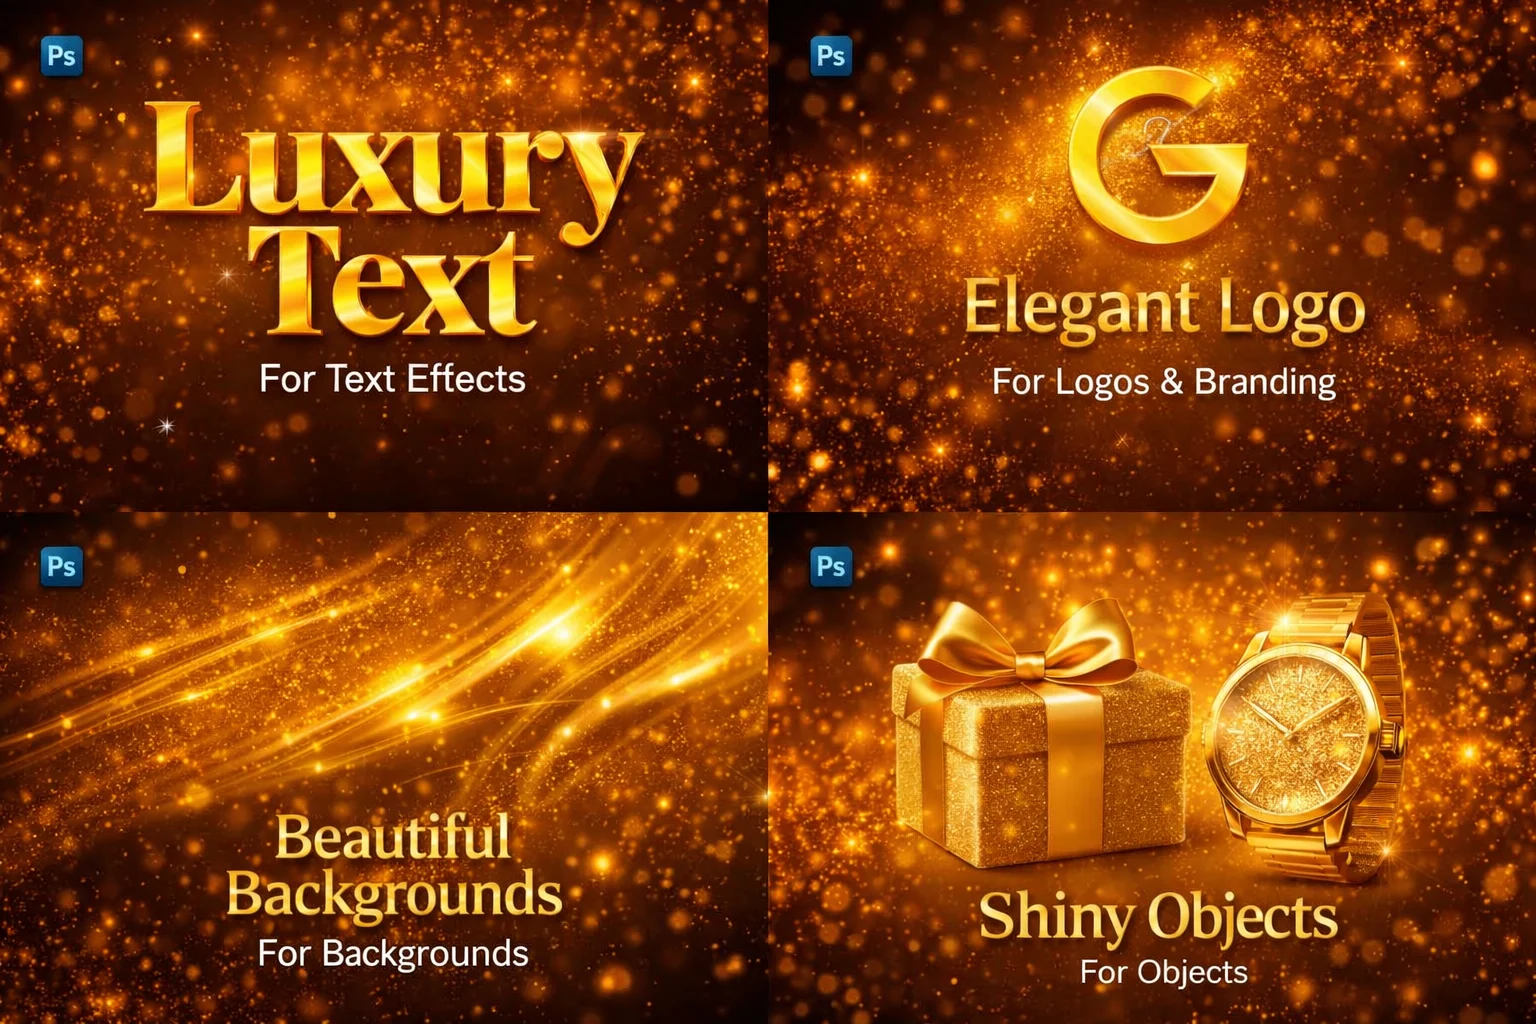
What Are Gold Gradients in Photoshop Used For?
- Luxury Branding & Logo Design — gold gradients elevate any wordmark or icon instantly
- Gold Text Effects — apply as a layer style for stunning metallic typography
- Wedding & Event Invitations — the most requested aesthetic for premium stationery
- Award Certificates & Badges — gold signals prestige and achievement
- Social Media Graphics — luxury product launches, fashion, jewellery content
- Packaging Design — premium cosmetics, perfume, chocolate, wine labels
- Poster Design — concert posters, film titles, editorial layouts
How to Apply a Gold Gradient in Photoshop
Short how-to section for application (different from installation). Cover 3 methods:
- Method 1 — Gradient Fill Layer: Layer → New Fill Layer → Gradient. Select your gold preset. Drag to adjust angle.
- Method 2 — Layer Style (for text/shapes): Double-click layer → Gradient Overlay → choose your gold gradient from the panel.
- Method 3 — Gradient Map (for photo colour grading): Layer → New Adjustment Layer → Gradient Map. Apply gold preset to remap photo tones to gold.
Frequently Asked Questions
Q1 What is a gold gradient in Photoshop?
A gold gradient in Photoshop is a preset colour blend that transitions smoothly between gold tones — from light champagne gold to deep burnished gold — which you can apply to text, shapes, backgrounds, or photos using the Gradient Tool or Layer Styles. Gold gradient presets are saved as .GRD files and can be imported directly into Photoshop’s Gradients panel for instant use.
Q2 Are these gold gradient Photoshop presets free for commercial use?
Yes. All 234 gold gradient presets in this pack are completely free for both personal and commercial use. You can use them in client projects, sold designs, printed materials, and digital products without attribution. There is no licence fee, no sign-up required, and no watermark on any of the files.
Q3 Which Photoshop versions are these gold gradients compatible with?
These .GRD gradient files are fully compatible with Adobe Photoshop CS6, CC 2015, CC 2017, CC 2018, CC 2019, CC 2020, CC 2021, CC 2022, CC 2023, Photoshop 2024, and Photoshop 2025. They are not compatible with Photoshop Elements or Photoshop Express, but will work with the free browser-based alternative Photopea.
Q4 How do I install a .GRD gold gradient file in Photoshop?
For Photoshop CC 2020 and newer: go to Window → Gradients, click the panel menu icon, select “Import Gradients…”, then locate and open your .GRD file. For older versions (CS6–CC 2019): go to Edit → Presets → Preset Manager, set the Preset Type to Gradients, click Load, and select your .GRD file. The entire process takes under one minute.
Q5 What is the difference between a gradient and a gradient map in Photoshop?
A gradient fills a shape, background, or layer with a smooth colour transition. A gradient map remaps the tonal values of an existing photo — shadows take on one end of the gradient colour and highlights the other. Gradient maps are commonly used to give photos a gold colour-grading effect without altering the original image structure.
Q6 Can I use these gold gradients in Figma, Illustrator, or Canva?
The .GRD format is Photoshop-specific and cannot be directly imported into Figma, Illustrator, or Canva. However, you can note the hex colour codes from each gradient stop in Photoshop and manually recreate them in those tools. Alternatively, export the gradient as a PNG and use it as a background image in any design tool.
Q7 What types of gold gradients are included in this free Photoshop pack?
This pack includes 234 presets across 8 categories: light gold and champagne gold, antique and aged gold, deep and dark gold, rose gold and blush gold, metallic shimmer and high-shine gold, burnished and textured gold, white gold and platinum-toned variants, and multi-stop complex gold transitions with three or more colour stops.
Explore more free metallic gradient packs:
- 200 Free Silver Gradient Photoshop Presets
- 200 Free Chrome Gradient Photoshop Presets
- 600 Free Metal Gradient Photoshop Presets
- Free Gold Photoshop Patterns
- Free Gold Text Effects for Photoshop